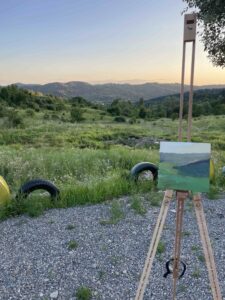
The Art of Japanese Landscape Painting
This is a step-by-step guide to starting your own Japanese landscape painting.
Before you get started, I suggest sourcing some reference images. Japanese landscape painting has a rich and profound history, reflecting the deep connection between humans and nature. I also suggest …forest bathing. If you can’t do that, just take a walk. It doesn’t have to be anything epic.
Materials Needed:
- Nihonga or Japanese watercolor paints (gansai)
- Brushes (fude) of various sizes, including a large flat brush and smaller round brushes
- Mulberry paper (washi) or rice paper
- Ink stone (suzuri) and ink stick (sumi) for grinding ink
- Palette for mixing colors
- Water container
- Felt cloth or towel for blotting brushes
- Pencil and eraser for sketching
- Reference images or inspiration from nature
Step-by-step guide
Step 1: Prepare Your Workspace
Choose a quiet and well-lit area for your painting. Traditional Japanese painting often incorporates a sense of tranquility, so a peaceful setting can enhance your artistic experience.
Step 2: Prepare Your Materials
Arrange your paints, brushes, water container, and ink stone within easy reach. Make sure your watercolors are set out on the palette and ready to use. Fill the water container with clean water for rinsing brushes.
Step 3: Select Your Subject and Composition
Decide on the landscape scene you want to paint. Japanese landscape painting often features mountains, rivers, cherry blossoms, and other natural elements. Sketch a simple outline of your composition lightly using a pencil on your paper. Keep the composition balanced and harmonious, following the principles of Japanese aesthetics.
Step 4: Grinding the Ink (Optional)
If you want to include ink washes in your painting, use the ink stick and ink stone to grind some sumi ink. Mix it with water on the ink stone until you achieve the desired consistency. Ink washes can add depth and contrast to your landscape.
Step 5: Begin Painting
Start with the background and distant elements of your landscape. Use light washes of watercolor to create a soft and ethereal effect. Let the colors bleed into one another for a seamless transition.
Step 6: Layering Colors
Gradually build up layers of colors to define the various elements of your landscape. Japanese watercolors are often translucent, allowing you to layer colors to achieve depth and dimension. Be patient, and let each layer dry before adding more colors.
Step 7: Embrace Simplicity
Japanese landscape painting embraces simplicity and the use of negative space. Allow areas of your painting to remain untouched, letting the white of the paper create highlights and breathing space.
Step 8: Detailing and Texture
Once the base layers are complete, add finer details and textures with smaller brushes. Pay attention to the fine lines of branches, the texture of rocks, and the delicate petals of flowers.
Step 9: Incorporate Ink Washes (Optional)
If you prepared ink wash earlier, now is the time to use it. Add ink washes to enhance the contrast and add calligraphic strokes to suggest movement or texture.
Step 10: Finishing Touches
Review your painting and make any necessary adjustments. Sign your artwork with a small signature or chop (a personal seal) in the corner.
Step 11: Patience and Practice
Remember that Japanese landscape painting requires patience and practice. Embrace imperfections and enjoy the journey of mastering this beautiful and meditative art form.
Final Tip: Embrace Wabi-Sabi
Wabi-sabi is an essential concept in Japanese art. It emphasizes the beauty of imperfection and the transient nature of all things. This is so important while making your landscape painting. Embrace wabi-sabi in your work. Maybe you are more familiar with the Bob Ross idea of ‘happy accidents,’ which encapsulates a similar idea. As he says, we don’t make mistakes, we make happy accidents.
No matter what you call it, the goal is to let go of perfectionism and celebrate the unique qualities of your artwork.
Here are more posts you might find interesting.
