The Art of Varnish
Varnishing your oil paintings will help them last a long time. In this post, I will share a step-by-step process to varnish correctly.
But, if you need a quick summary, here is a summary of this quite exhaustive post:
After you’re done you’re oil painting, you can varnish it if you want. This will give your painting extra protection, make your colors richer, and make the surface appear smoother. If you decide to do it, you’ll probably want to use removable varnish.
Now, let’s wade into the details.
Why do it?
Varnishing is the final step in the creation of an oil painting. Not everyone does, though. I don’t usually varnish my paintings. I use a lot of linseed oil and the resultant glazing effect is similar to varnishing. However, varnishing has many benefits.
Primarily, we varnish paintings to preserve and protect them. In addition, many people varnish their paintings because they like the look of varnish. I will explain these reasons in more detail below.
preservation and protection
Adding varnish to a painting after you finished will protect the artwork from external elements. For example, it will protect the painting from dust, UV radiation, moisture, and even some pollutants.
Reversible Protection: One of the significant advantages of varnish is that you can remove it. Varnish is usually removable and replaceable. If the varnish layer becomes discolored or shows signs of deterioration over time, it can be safely removed and replaced with a new layer without harming the original paint layer. In this way, it can really help preserve the painting for long periods of time.
UV Protection: Varnish offers some degree of UV protection. Ultraviolet (UV) light from natural and artificial sources can cause fading and degradation of pigments in the paint. Varnish acts as a filter, absorbing some of the harmful UV rays and reducing their impact on the paint layer.
Moisture Resistance: Varnish creates a barrier. This barrier helps prevent moisture from coming into direct contact with the paint layer. High humidity levels can cause swelling and cracking of the paint, leading to irreversible damage. Varnish helps to mitigate this risk.
Transport and Handling Protection: Removable varnish can provide an added layer of protection during the transportation and handling of the artwork, safeguarding it from minor scuffs and abrasions.
color enhancement and a smooth look
Enhancing Color and Depth: Additionally, varnishing keeps your paintings lustrous It gives paintings a more saturated, vibrant appearance. Some people describe the colors as richer once varnished. The process can also enhance the visual depth and luminosity of the artwork. It is up to you to decide if you find the varnished look more visually appealing.
Evening Out Surface Appearance: As oil paintings age, the paint surface can become uneven due to the differential drying rates of paint layers and the appearance of tiny cracks (craquelure). A layer of varnish can visually unify the surface, giving the painting a more consistent and cohesive appearance.
Types of Varnish: which one should I use?
There are two main types of varnish, removable and non-removable. Whichever you choose, it is important that you choose a high-quality varnish. Then, you can also choose between different finishes, such as glossy, satin, or matte.
Removable varnish
Most artists use removable varnish.
Using removable varnish on an oil painting offers several benefits, making it a preferred choice for most artists and conservators. Here are the key advantages:
- Reversibility and Adjustability: One of the primary advantages of removable varnishes is that they can be easily removed without damaging the original paint layer. This reversibility allows conservators to clean and restore the painting as needed over time, ensuring its longevity without causing harm.
- Restoration and Conservation Flexibility: Since removable varnishes can be taken off, conservators can access the original paint layer for cleaning and restoration. This is especially valuable for aged or deteriorated varnishes that may require replacement or for addressing specific conservation issues that arise over time.
- Choice of Finish: Artists can select from various types of removable varnishes, offering different finishes, such as glossy, satin, or matte. This allows artists to tailor the final appearance of their artwork according to their artistic vision.
- Testing and Reapplication: Removable varnishes enable artists and conservators to perform test patches before application. This allows them to evaluate how the varnish will affect the painting’s appearance without committing to a permanent layer. Additionally, if the varnish becomes discolored or damaged over time, it can be safely removed and reapplied without harm to the painting.
Due to these advantages, removable varnishes are widely used in the conservation and preservation of oil paintings. They offer a balance between protection and reversibility, ensuring that the artwork can be enjoyed for generations while still allowing for necessary maintenance and conservation efforts as the painting ages.
Non-Removable Varnish
Using a non-removable varnish on an oil painting can offer certain benefits in specific situations or for particular artistic intentions. However, it’s important to note that applying a non-removable varnish is a more permanent decision and may not be suitable for all paintings. Here are some potential benefits:
- Enhanced Protection: Non-removable varnish provides a long-lasting protective layer that shields the painting from dust, dirt, pollutants, and physical damage. This can be particularly useful for artworks exposed to harsh environments or undergoing frequent handling.
- Stabilization and Conservation: Some non-removable varnishes are designed to consolidate and stabilize fragile paint layers or surface textures. By adhering permanently to the paint layer, these varnishes can mitigate the risks of flaking and further deterioration.
- Saturated Color and Appearance: Non-removable varnishes can enhance the colors and appearance of the painting, providing a more saturated and lustrous finish. They can also enrich the contrast and depth of the artwork, adding to its visual appeal.
- Elimination of Varnish Removal Risks: When a non-removable varnish is applied correctly, it removes the risk of future varnish removal procedures, which, if not done carefully, can inadvertently damage the paint layer or alter the artwork’s appearance.
- Simplified Maintenance: Non-removable varnishes may require less maintenance over time than traditional removable varnishes, as there’s no need for periodic re-application or varnish removal and replacement.
- Artistic Intent: Some artists may use a non-removable varnish as part of their creative vision. They prefer the specific aesthetic qualities it imparts to the painting. It can be an intentional choice to achieve a particular visual effect or to create a more durable artwork.
Preparation for Varnish
There are two main issues to focus on when preparing to varnish your painting. This includes the drying time of your painting and cleaning the painting surface before varnishing.
cleaning the painting surface
How to Varnish: Step-by-step
The varnishing process requires a careful and methodical approach.
First, be sure your painting is ready. You need to make sure your painting is totally dry. This means waiting six to twelve months, depending on the thickness of the paint. Yes, that’s right. Just because your painting feels dry, doesn’t mean it is. Oil takes a very long time to totally dry.
In addition, you have to clean the surface of your painting. Be extra careful that there isn’t any dirt, dust, or grime on it. Use a gentle brush or lint-free cloth to clean the painting’s surface. Any dust you miss, will be trapped in that painting forever. Yuck.
Then, get your material in order.
You will need: varnish, soft brush, and a clean, ventilated space.
Finally, you’re ready to varnish. Follow these basic steps.
1. Choose the Right Varnish.
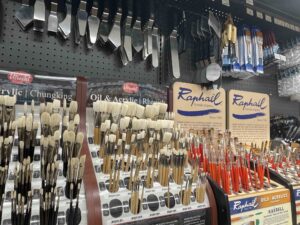
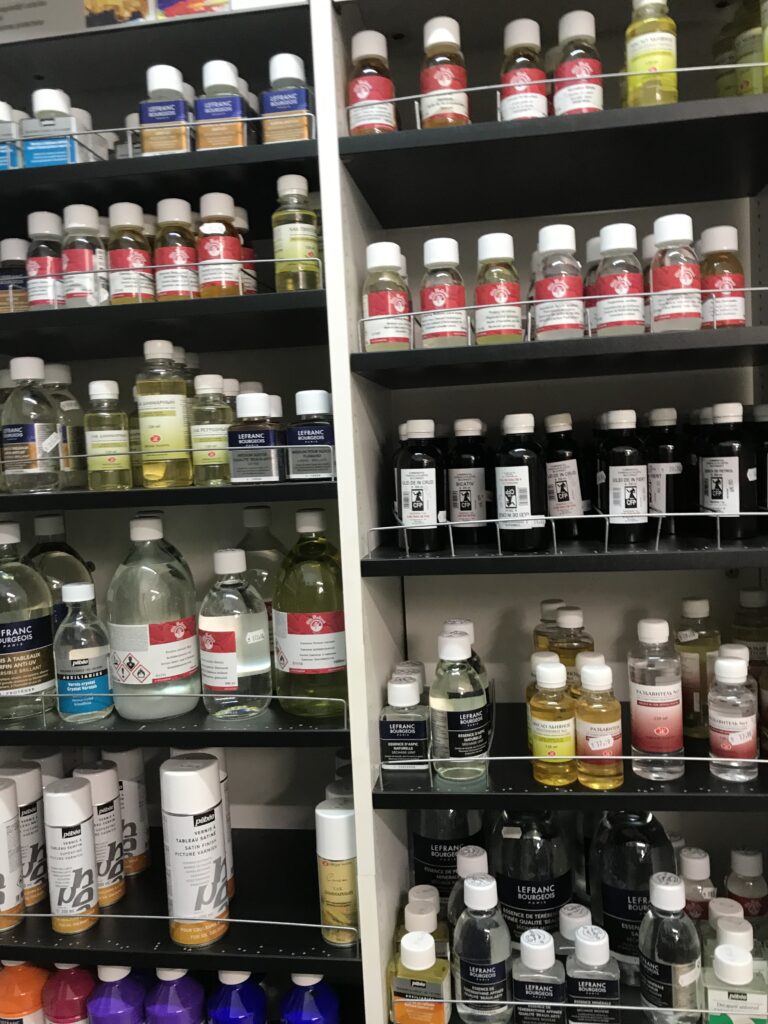
Start by going to a fine art store that specializes in oil paint to pick a high-quality one. In the US, you can try Blick. A smaller store is fine, too. I used to love going to Merion Art and Repro in Ardmore, PA because they give you such personalized help. You will find the varnish next to the linseed oil and mineral spirits. Then, read above and decide if you want removable or non-removable varnish. If you don’t know, choose removable.
2. Make a clean space
Next, choose an appropriate environment: Select a clean and dust-free space with controlled humidity to avoid any particles settling on the varnish during application. Also, it is essential to work in a well-ventilated area
3. Test the varnish
Prior to applying the varnish directly on the painting, I recommended you conduct a test application on a small, inconspicuous area to ensure compatibility and desired results.
4. Apply the varnish
Using a clean and soft brush designed for varnishing, start applying the varnish in thin, even coats. Allow each coat to dry completely before applying the next.
5. Apply the varnish again
Consider applying multiple coats. Depending on the desired effect and the specific varnish used, multiple coats may be necessary to achieve the desired level of protection and aesthetic appeal. Apply each layer perpendicular to the previous one to ensure even coverage.
6. Wait…a long time.
Drying and Curing:
Once all the varnish coats have been applied, the painting needs to dry and cure. The drying time will depend on the type of varnish used, but typically it can take several days to a few weeks. During this period, it’s important to protect the painting from dust, direct sunlight, and extreme temperature fluctuations.
FAQ
Should you use multiple coats?
It is really up to you. As long as the varnish is evenly coating your painting, one coat may suffice.
Finally, it is important to apply the correct long-term care to your finished painting. This includes handling the varnished painting correctly, dusting it regularly, and possibly restoring it or cleaning professionally if needed.
How do I handle the varnished painting?
After varnishing, it’s crucial to handle the painting with care. Avoid touching the varnished surface directly and keep it clean. You can do this a few ways.
lint-free gloves– use lint-free gloves when necessary. You know, those you see fancy art handles use in the movies.
regular dusting– consider dusting your painting with a soft brush or a microfiber cloth regularly. This will help maintain the cleanliness and appearance of the painting.
Do I need professional restoration and cleaning?
If restoration or cleaning becomes necessary, consult a professional conservator.
In the USA, several businesses and institutions specialize in professional restoration and cleaning services for oil paintings. These conservators and art restoration experts are trained to work with delicate artworks, including oil paintings. They use specialized techniques and materials to preserve and restore them. Here are some reputable businesses and organizations that offer such services:
Some painting restoration businesses
- Fine Art Conservation Laboratories (FACL): FACL, based in Santa Barbara, California, provides art conservation and restoration services for various types of artworks, including oil paintings. They have experienced conservators skilled in cleaning, repairing, and preserving paintings.
- Whitten & Proctor Fine Art Conservation: Based in Houston, Texas, this art conservation firm specializes in restoring and preserving oil paintings, as well as other types of artworks.
- Art Conservation Associates (ACA): ACA, located in New York, offers art conservation and restoration services, including expertise in treating oil paintings and works on paper.
- ArtCare Conservation Studio: This studio, based in Miami, Florida, provides art conservation and restoration services, including treatments for oil paintings, sculptures, and other artworks.
- Williamstown Art Conservation Center: This center, located in Williamstown, Massachusetts, offers conservation and restoration services for paintings and other artworks.
Look for conservators with proper credentials and certifications from reputable organizations. Also, look for those with experience in handling similar types of artworks. Additionally, don’t be afraid to ask questions. Always inquire about their methods, materials, and previous restoration projects to ensure that your precious oil painting will be in safe hands.
Following all these steps will ensure your painting’s longevity and maintain its lustrous appearance.
more
How long does oil paint take to dry?
- Mixing It Up: House paint and oil paint?
- To Gesso or Not to Gesso? Exploring House Paint in Your Art
- What is the best way to apply gesso to canvas?
- All About Black Gesso
- Gesso Substitutes in a Pinch
- Brushing Up on Oil Painting: Essential Toolkit